Apply to attend a market
How a vendor asks to attend a market, and how an organiser approves it. Read the box below first, because this is the part people most often misunderstand.
About 7 minutes to read
Before you start
- A published vendor listing, if you are applying
- A published market, if you are approving
This is Attendance Confirmation, not a stall booking
Applying here tells an organiser you intend to attend, and lets them confirm it. It is not a stall booking, it does not reserve a pitch, and no stall fee is paid through this site.
Stall bookings are handled by the market itself, exactly as they are now. Market Hive SA never takes a booking or a payment for a stall.
For vendors
Step 1: Find the market on your dashboard
Log in and look for the Upcoming markets panel. It lists published markets with the soonest dates first, so the most useful ones are at the top.
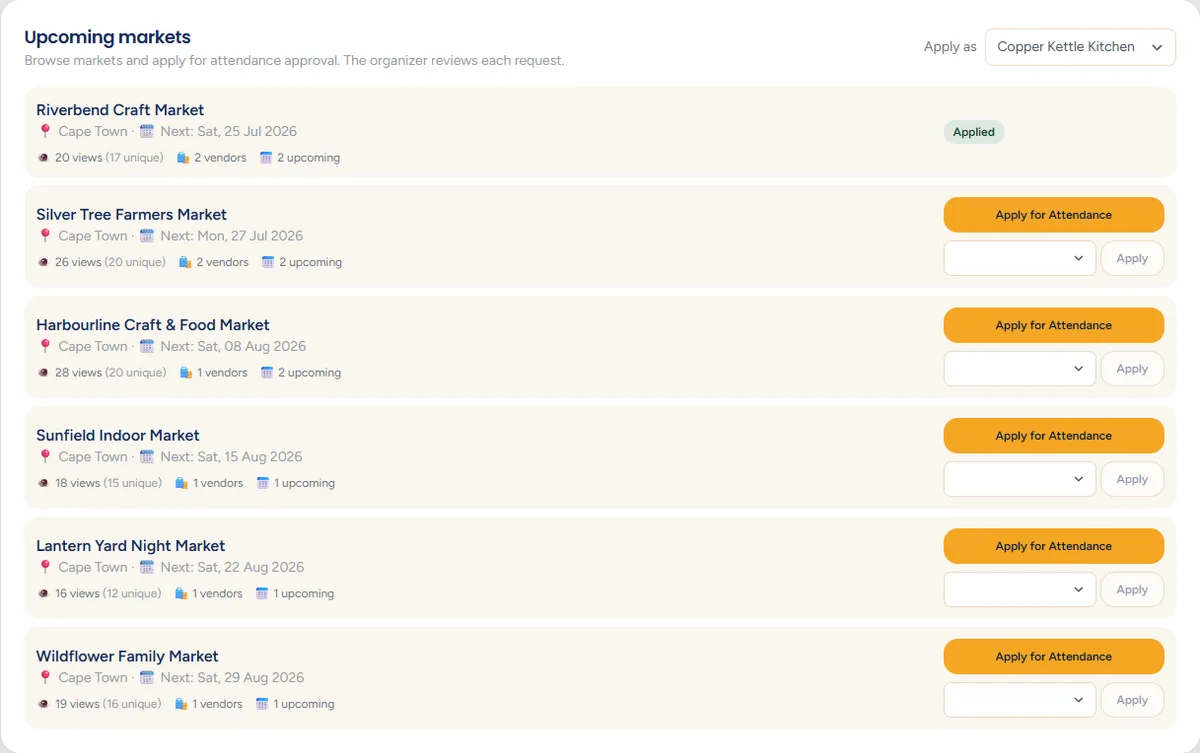
The small figures on each row are worth reading before you apply:
- views - how much attention the market's page gets, with unique visitors in brackets.
- vendors - how many are already approved. Useful for judging competition.
- upcoming - how many future dates are published.
Step 2: Choose which listing is applying
If you own more than one vendor business, use the Apply as drop-down at the top right of the panel to pick which one is applying. It is easy to miss, and applying as the wrong business is the most common mistake here.
Step 3: Apply for a single date, or as a regular
You have two ways to apply, and they mean different things.
- Apply for Attendance (the gold button) asks to become a regular trader at that market, rather than for one specific day.
- Pick a date from the drop-down and click Apply to ask for one specific date only.
Which should you choose?
Step 4: Watch for the answer
Your request appears immediately in My market attendance applications with its current status. The row updates when the organiser responds.
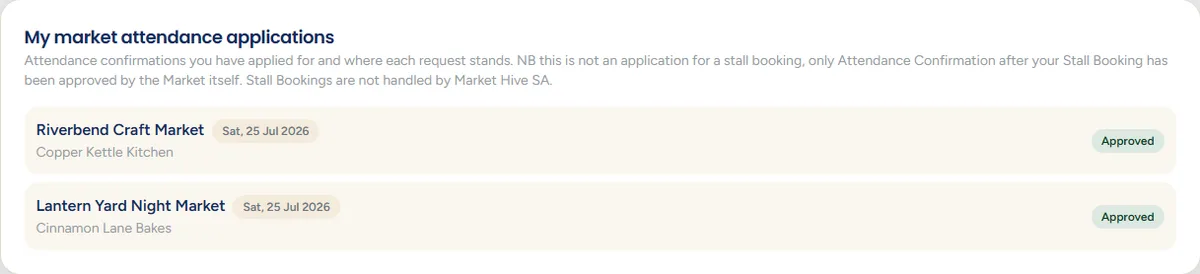
- Pending - the organiser has not answered yet.
- Approved - you are confirmed as attending.
- Declined - not this time. Often about space or category balance, not about you.
Approved is not a booked stall
Step 5: Give yourself the best chance of a yes
Organisers see your listing when they read your application. Before you apply, make sure:
- your listing is published, not still pending
- your photos show what you actually sell
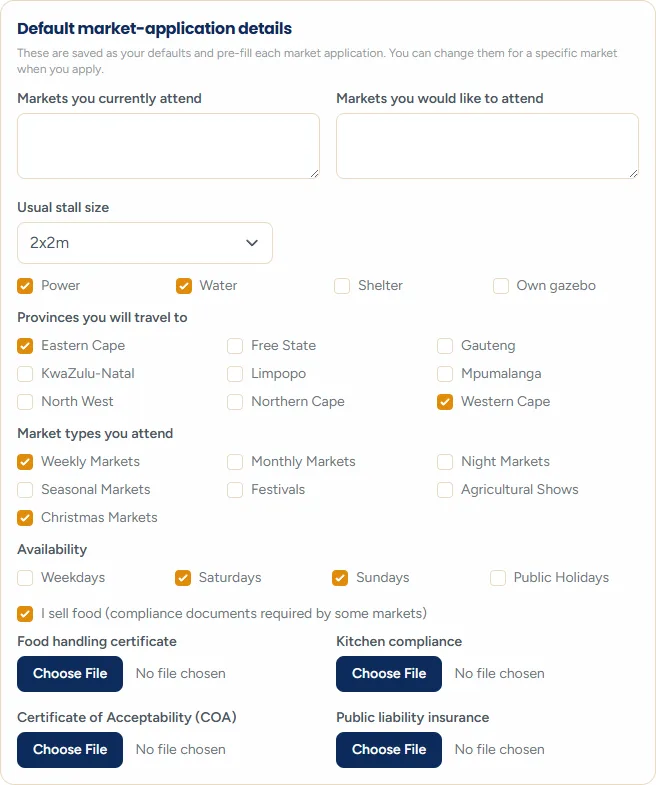
- your stall size, power, water and shelter needs are filled in and accurate
- if you sell food, your certificates are uploaded
For organisers
Step 6: Find requests waiting for you
Requests appear on your dashboard inside your markets panel, in the gold-bordered block headed Vendor attendance applications. A count next to the heading tells you how many are waiting.

Step 7: Read what the vendor sent
Each request gathers everything you need to decide, so you do not have to go hunting:
- business name, contact person, mobile and email
- their product categories, and whether they sell food
- the stall size they want, and whether they need power, water or shelter
- whether they have their own gazebo
- the specific date, or a "regular trader" label
- any note they added with the application
- their compliance certificates as links you can open and check
Check food certificates before approving
Step 8: Approve, decline, and manage the line-up
Approve or decline from the request itself. Everyone approved moves into the Attending vendors block below.
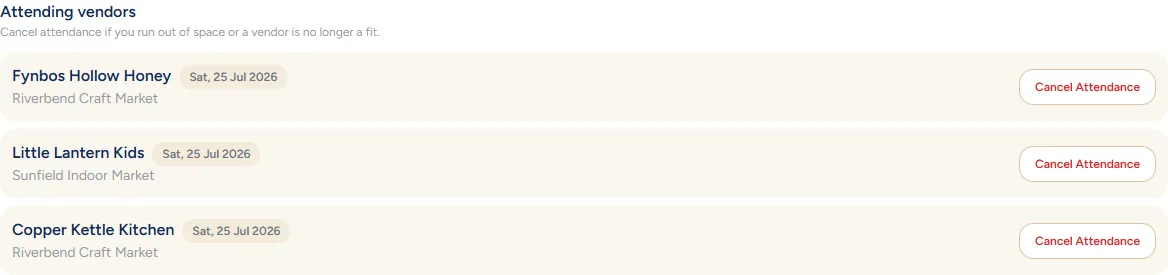
From there you can:
- Remove a vendor from one date - useful when a regular trader cannot make a particular market day. Their standing arrangement stays intact and they return the following time.
- Cancel a vendor entirely - ends the arrangement altogether.
Answer quickly, even when it is a no
Setting up the dates vendors can apply for is covered in the market guide.
Still stuck? Email [email protected] or use the contact form. Tell us which step you are on and we will walk you through it.