List your vendor business
For stallholders, makers, bakers, food traders and anyone who sells at markets. This walks through the whole form, section by section, with a picture of each part.
About 15 minutes to read
Before you start
- A Market Hive SA account, and you are logged in
- A logo or a clear photo of your product
- Your contact number and email
- If you sell food: your food handling and compliance certificates as photos or PDF files
Step 1: Open the form
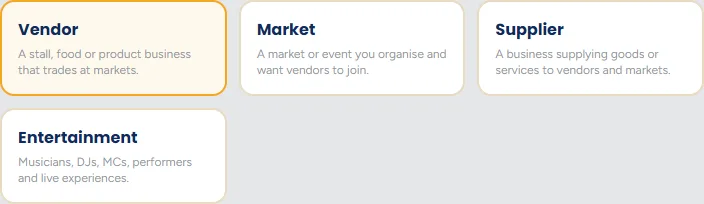
On your dashboard, click the gold + Create a listing button at the top right. Then make sure Vendor is the highlighted button at the top of the form.
You do not have to finish in one sitting
Step 2: Business details
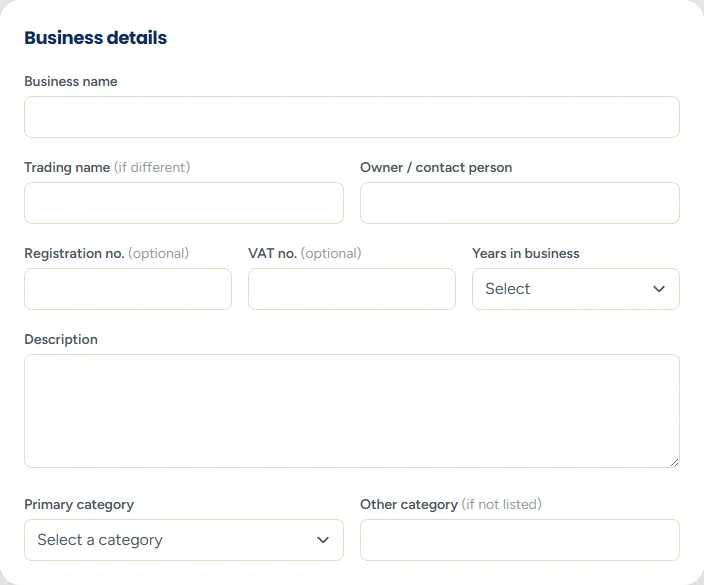
- Business name - the name customers know you by. This becomes the heading on your public page, so write it exactly as you want it seen. "Copper Kettle Kitchen", not "copper kettle".
- Trading name - only if you trade under a different name to your registered one. Leave it empty if they are the same.
- Description - a few sentences on what you sell and what makes it worth a visit. Write it the way you would tell a customer at your stall.
- Category - pick the one that fits best. This decides which searches you turn up in, so it matters. You can tick extra categories underneath if you genuinely span more than one.
Do not tick every category
Step 3: Contact and location
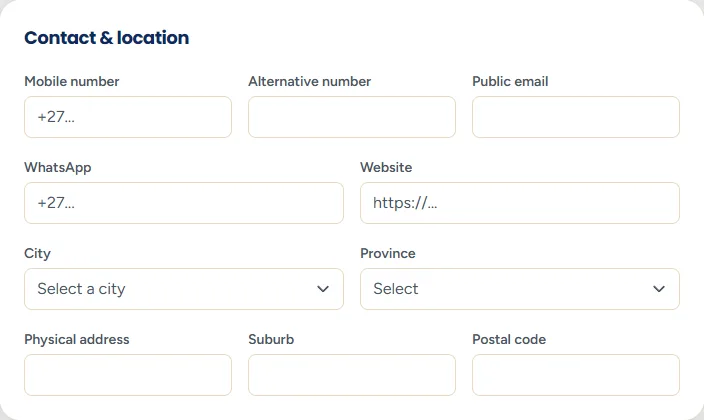
- Contact person - who should be asked for. Usually you.
- Mobile and WhatsApp - the number you actually answer. Most enquiries from this site arrive by WhatsApp, so fill it in if you use it.
- Public email - shown on your listing. It can be different from the email you log in with, and often should be.
- Province, city and suburb - used by shoppers filtering for what is near them. Get these right or local customers will not find you.
- Address - only if you want people arriving at a physical place. A market trader with no shopfront can leave it blank.
Anything you put here is public
Step 4: Products
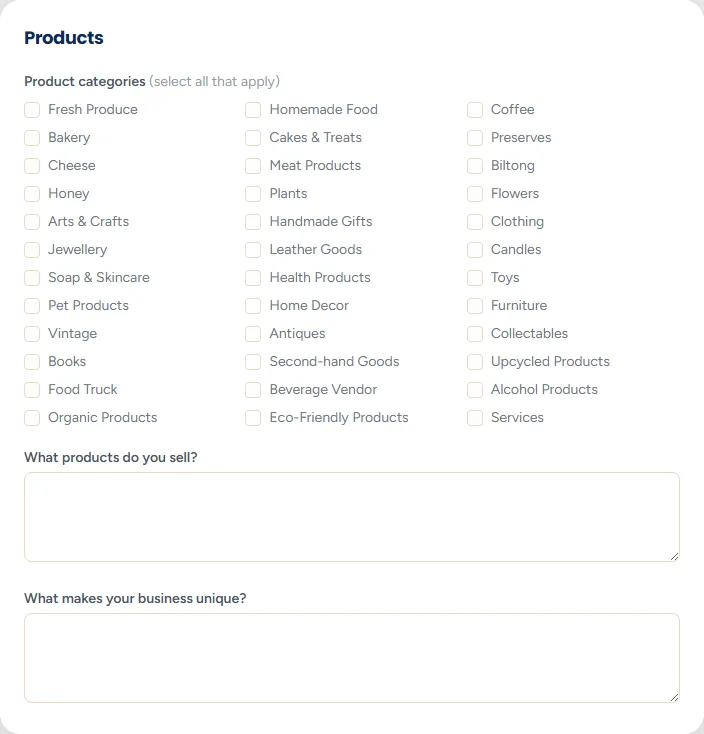
- What products do you sell? - be specific. "Sourdough loaves, cinnamon buns and seasonal preserves" is worth far more than "baked goods", because those are the words people actually type into a search box.
- What makes your business unique? - your one honest difference. Gluten free, made on the farm, family recipe, plastic free packaging. One real thing beats three vague ones.
- Price range - sets expectations so you get fewer wasted enquiries.
- Payment methods - tick everything you accept. "Cash only" is genuinely useful for a shopper to know before they drive out to a market.
Step 5: Markets
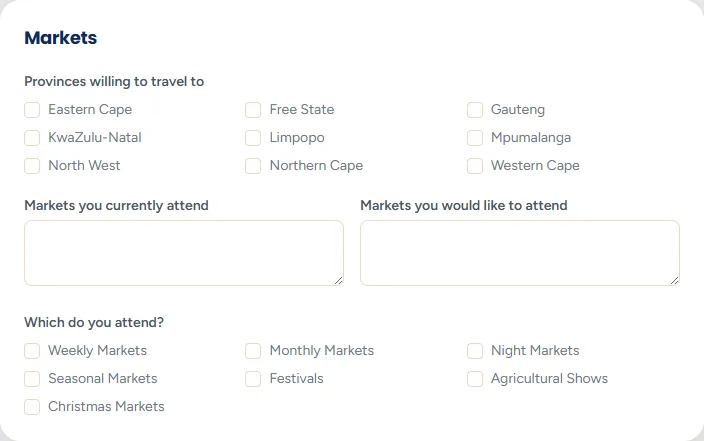
Organisers read this section when they are deciding whether to accept you. Listing the markets you already trade at is the closest thing to a reference you have here, so fill it in even if the list is short.
Provinces you travel to matters more than people expect. An organiser two provinces away will not approach you unless you have said you will travel.
Step 6: Stall information
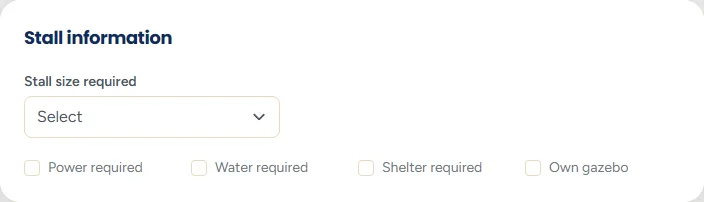
This is the logistics an organiser needs before they can place you. Be accurate rather than modest: turning up needing power at a market with no power is a bad day for everyone.
These become your defaults
Step 7: Food vendors
Tick I sell food and four upload boxes appear. If you do not sell food, skip this section entirely.
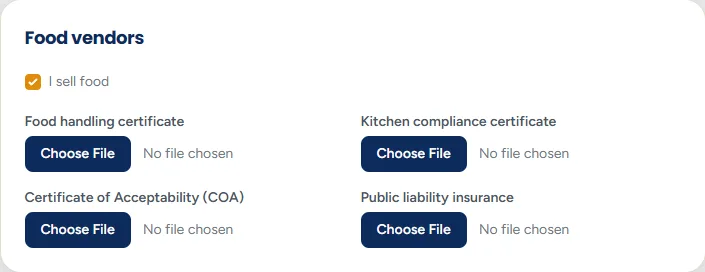
- Food handling certificate
- Kitchen compliance certificate
- Certificate of Acceptability (COA)
- Public liability insurance
Each accepts a PDF or a photo, up to 8 MB. A clear photo taken on your phone is fine as long as the text can be read.
Uploading these gets you approved faster
Step 8: Promotions and matching
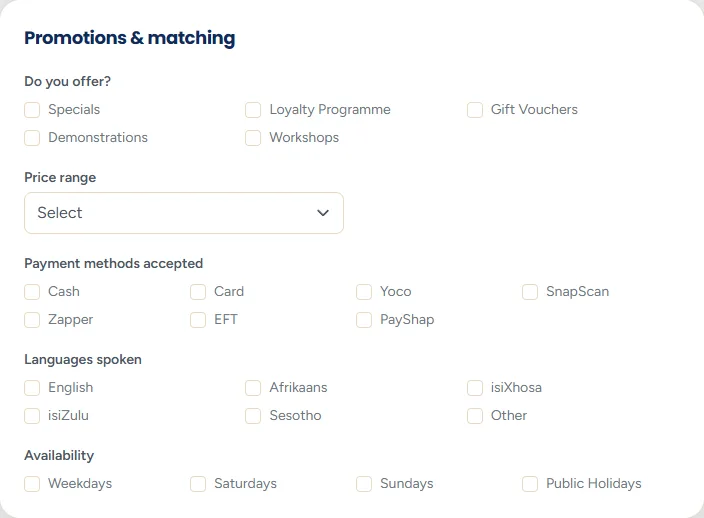
Languages and availability are used when we suggest markets to you and suggest you to organisers. Promotions is simply what you offer: specials, loyalty cards, bulk discounts.
Step 9: Marketing
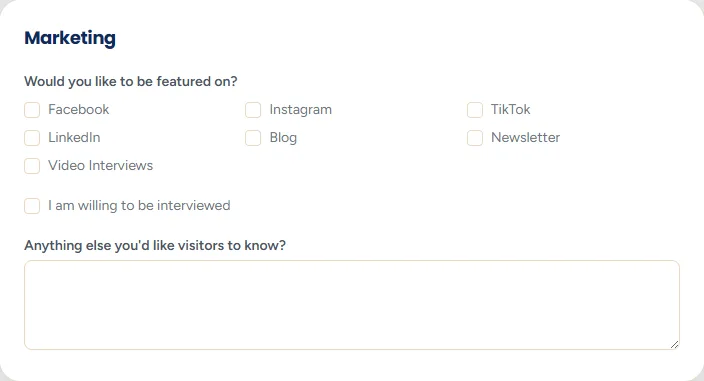
Ticking the channels you use tells organisers you will help promote a market day, which counts in your favour when they choose between applicants.
Step 10: Images
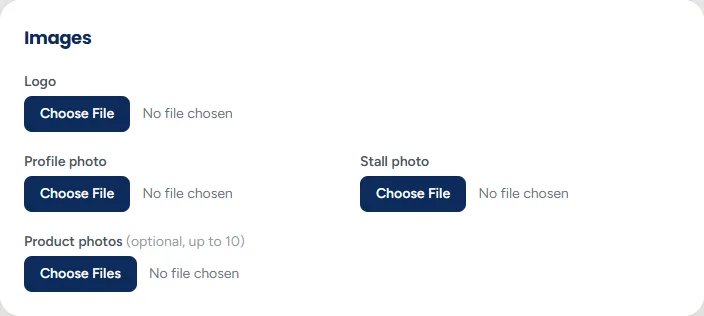
- Main image - your logo, or your best single product photo. This is the picture shown in every directory listing, so it is the one that decides whether anyone clicks. Up to 4 MB.
- Gallery - up to ten more photos. Your stall set up, your products, you at work.
Photograph in daylight
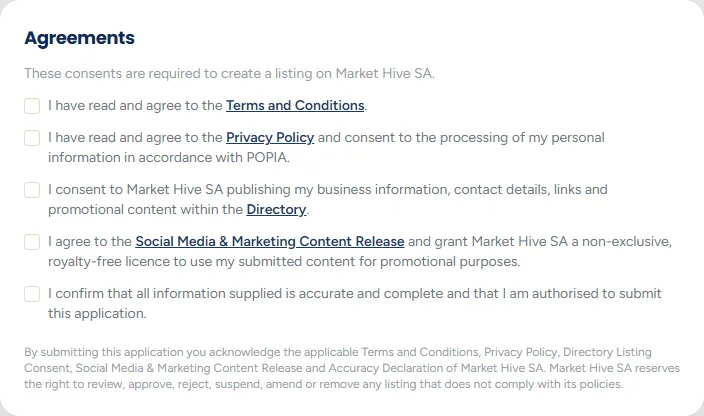
Step 11: Agreements
Five tick boxes, all compulsory. They confirm you accept the terms and privacy policy, that you want to be listed in the public directory, that we may show the content you upload, and that your information is accurate.
Why the fuss
Step 12: Submit it

Click Submit application. If anything compulsory is missing, the page scrolls to the problem and shows a short message in red. Fix it and submit again.
Where you land next depends on how you started. If you picked a plan on the Hive Memberships page first, you go straight to checkout to finish joining. If you started from + Create a listing on your dashboard, you go back to the dashboard and your listing appears with a pending label.
Step 13: What happens next
A person at Market Hive SA reads every new listing before it goes live. This is what keeps the directory worth using. Once approved, the label changes to published and your page is public.
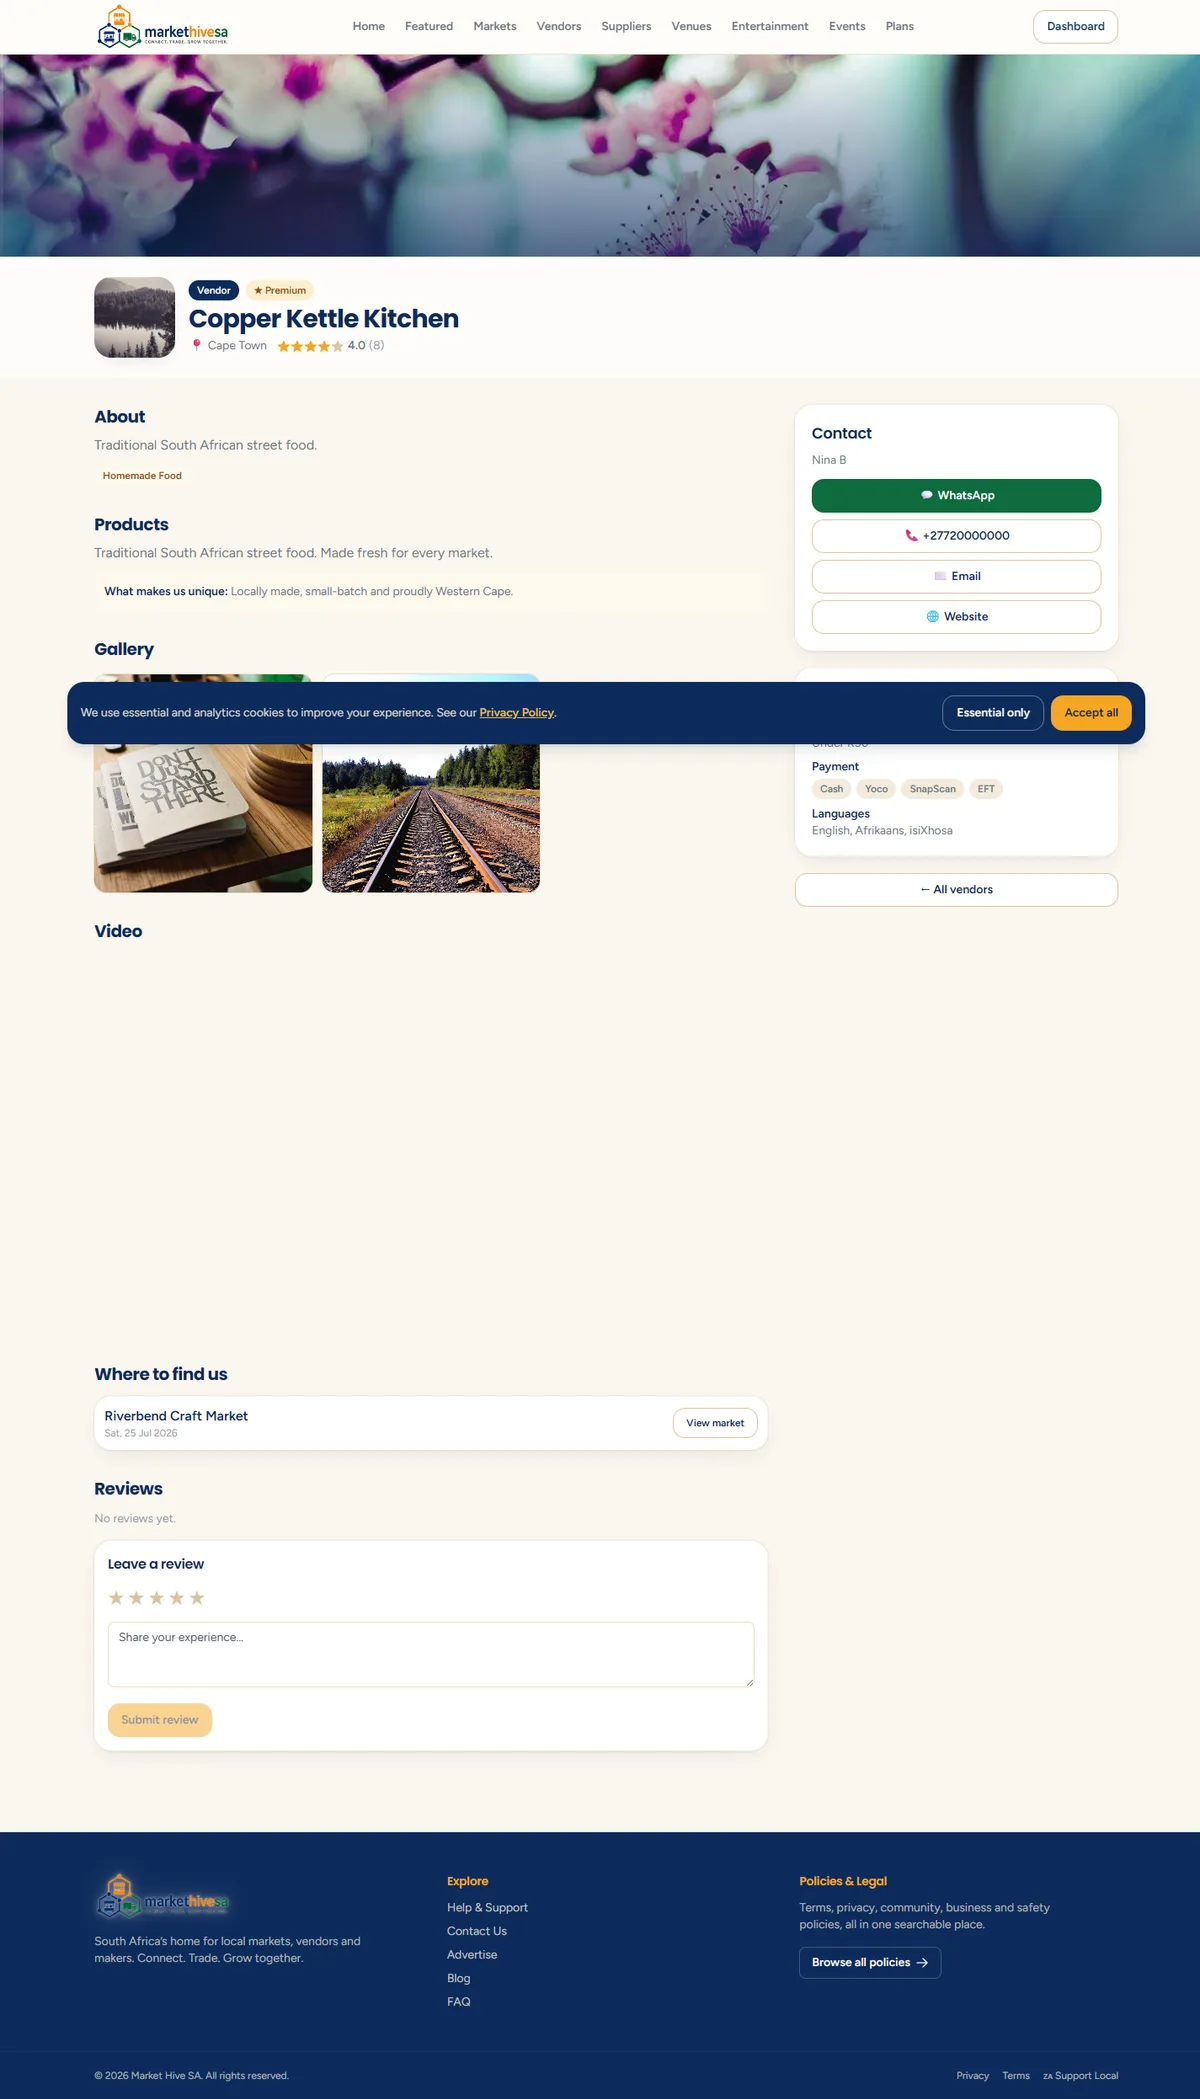
Once you are live, the useful next steps are:
Still stuck? Email [email protected] or use the contact form. Tell us which step you are on and we will walk you through it.